A water tank is common storage in the house. It can be constructed with concrete as well as bricks covering the plasters. However, when the times come, it will be leaking due to the loosening of the internal bonding. Because of this, we need to waterproof the water tank to stop wasting the water. You can follow these steps to do it.
The guidance aims to prevent the water from leaking from the tank. And also, line up the suitable methods that you can use for the DIY.
01. Find the Reasons For Leaking the Water Tank
The water tank is always filled with water. Before we find a solution for the leaking, we must seek the ways why it has happened. So let’s see. What are the reasons for the water tank leaking?
- Cracking – Due to the poor strength, the tank can be cracked. And also, due to the sudden loading, it can be damaged. If you have used bricks, it can easily crack with plaster.
- Poor Bonding – After pouring the basement, walls are constructed. The bond between walls and floor should be well connected. But mostly, the connection has loosened and water will be leaked
- Construction Joints – There are both horizontal and vertical construction joints. If these construction joints are not properly sealed, water can become out.
- Plumbing Edges – When the plumbing and piping entrance are not properly sealed, water can leak from the edge. Because plastic, metal will not bond with concrete.
- Curings and Honeycombs – Curing is essential for concrete walls. But if there is any less curing the wall can be cracked. As well as due to the poor concrete pouring there will be honeycombs. So it will crack and leak.
- Loosen Plasters – This is happened due to the loose plasters in the brick walls and slabs.
- Weathering – When considering a long time period, brick walls can be cracked due to the environmental situation. Because of this, it will leak the water.
The above reasons are mainly in the concrete and brick constructions. Here I have mainly pay attention to the concrete and brick constructions only. And below, you can find the ways for the waterproofing and the productions you can use for your purposes.
02. Surface Preparation
- If the tank is filled with water, start the clean it. There may be fungus in the wall. Using a wire brush, you can clean the surface with water by reducing it. So additionally you will not need water for the cleaning. If there is any serious leaking, use sealant to close it. When you are cleaning the surface, identify the cracks and areas and mark it any way that you can find at any time.
- After cleaning with water and then letting it dry then, clean the outside as well as inside by scratching the walls. When the process is over, wash it the remove the dust. Make sure the surface is free from dirt, oil, and other losing material.
- If the tank is built with brick and the plaster is loosened, fix it with the bonding agent. And also, reinforcement can be visible if the situation is bad. For these, use a cementitious waterproofing application to cover the areas.
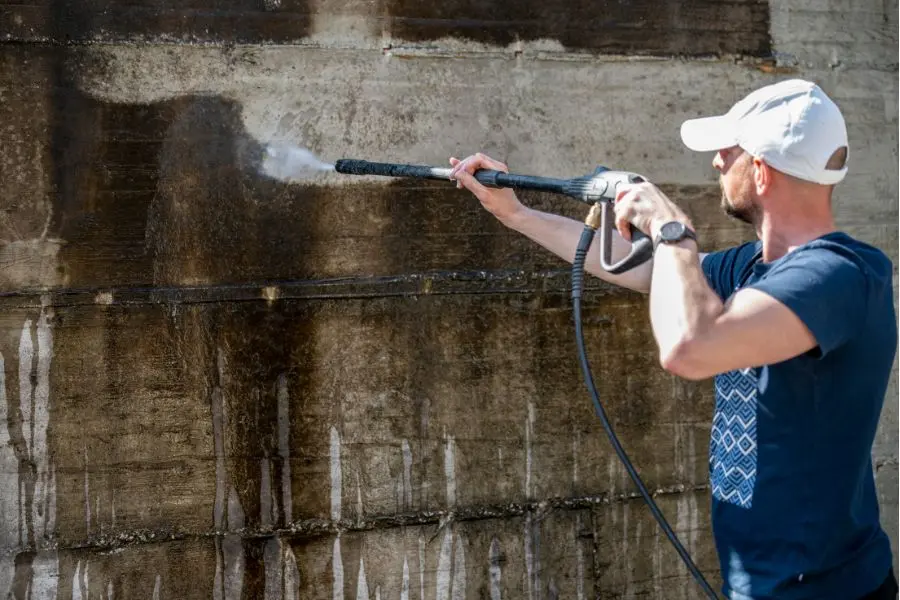
- For the newly constructed surface, let it cure for 28 days until concrete gains its maximum strength. And then wash it with a high-pressure gun to remove the small particles like dust.
- For the construction, joints use a suitable method for preventing leaking through it. There is a rubber Dr Fixit waterboard. Later there was a plastic water bar, and due to many problems, it is difficult to use and sometimes not efficient.
03. Waterproofing Methods for Water Tank
Before you select the products, you should check a waterproof method that you can use. Because every waterproofing method is not able to use everywhere. So mainly, there are two types of methods according to durability.
Temporary Methods
There are many temporary methods. Those are very conventional and not long-lasting. The popular method is to apply a 1:4 cement sand mixture on the surface where the sands are too small.
Permanent Methods
For the waterproofing, a water tank inside I can suggest you do it with acrylic cementitious waterproof coating. You can use Dr. Fixit for that, and also If you can use a two-component epoxy waterproof coating that can help protect the tank from forming algae and fungus or any bacterial growth.
For the bitumen and any other membranes can you use? I don’t think so. Bitumen or any other sheet membranes cant be used here due to toxicity and odder.
04. Product Selection for Water Tank Waterproofing
When the product is selected, you must pay attention to many sides. According to the purpose of the water tank, applied waterproofing can be changed if it is a drinking water tank.
Your product must not be toxic and odder. And also, there should not be any side effects and should be certified by a government-accepted institute.
When you select the product, you should ask about the waterproofing warranty of the product or service. So it will be a great help, when there is any failure.
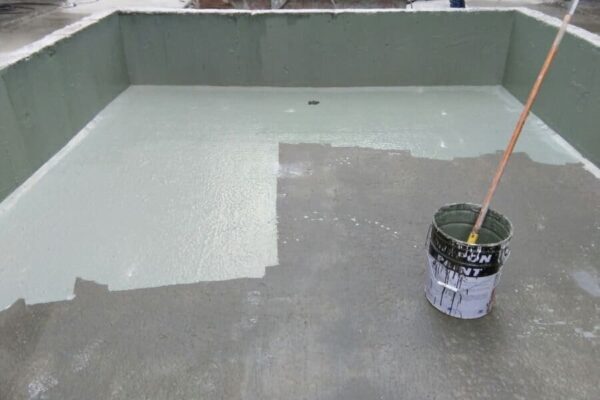
05. Apply the Waterproofing in Water Tank
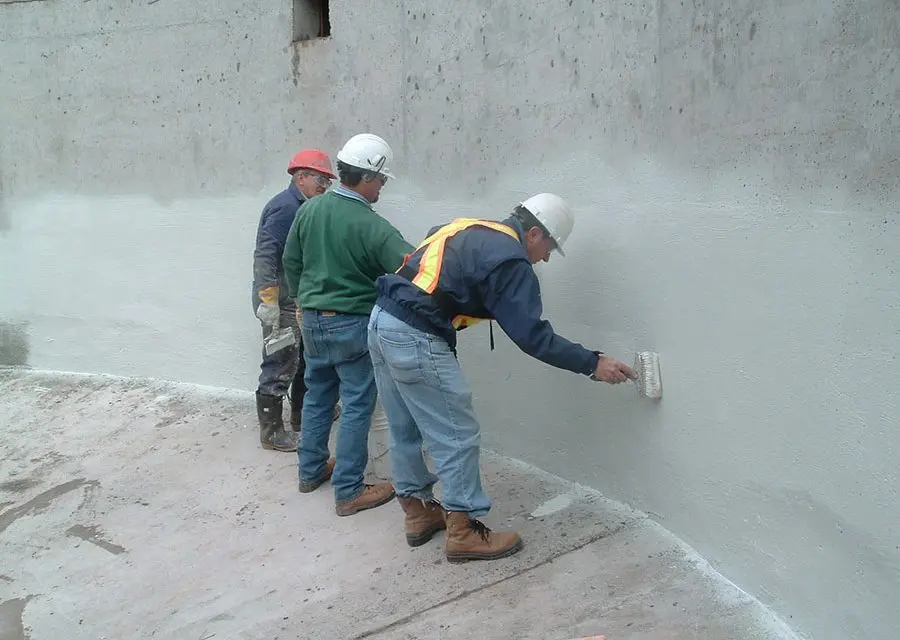
- After selecting the product then, you need to apply it. Before applying it, make sure there is no dust, fungus, loosened area, or any oil marks that will resist the adhesive on the waterproofing and wall.
- Will it need to apply both inside and outside? If it is in the product guidance, you can do it. Else it will be no need. You can apply it with a brush, spray, or using a sponge. And then spread to cover all the area. And let it cure.
- If it is a large tank, you will need any other membranes for the edges inside. Apply both inside and outside is very good for durability.
- Apply the second coat as it is perpendicular to the first layer.
- The plumbing opening areas should be covered carefully with special methods using bands.
Read More About – How to Waterproof Concrete Slab? – Essential Steps
06. Testing for Leakings Before Using
After applying the waterproofing, let it cure. When the curing is finished, apply the second coat if it is necessary. Then fill it will water (ponding) for testing and check carefully if there is any leaking.
A waterproofing structure can fail due to one of these 17 Reasons and you should know about them to protect your structure.
Related Topics